Boat Trailer LED Lights Work Until They Get Wet: How to Diagnose Water-Related Electrical Failures
In this article
A boat trailer can pass every lighting check in the driveway and return from the ramp with one lamp flickering, both rear lights dim, or a lighting circuit completely dead. Replacing the lamp may help temporarily. If water is still reaching a connector, splice, ground terminal or damaged cable, the same problem can return on the next trip.
When boat trailer LED lights fail after getting wet, inspect the complete electrical path before condemning the lamp. Establish when the failure appears, inspect the exposed connections with power disconnected, and compare the affected circuit's supply and ground return under normal operating load. A lamp becomes the leading suspect when its external circuit is sound and the fault remains with the lamp assembly during a controlled test.
The useful question is where water changed the system: inside the lamp, at a contact, around a ground attachment, or within a damaged length of wire.
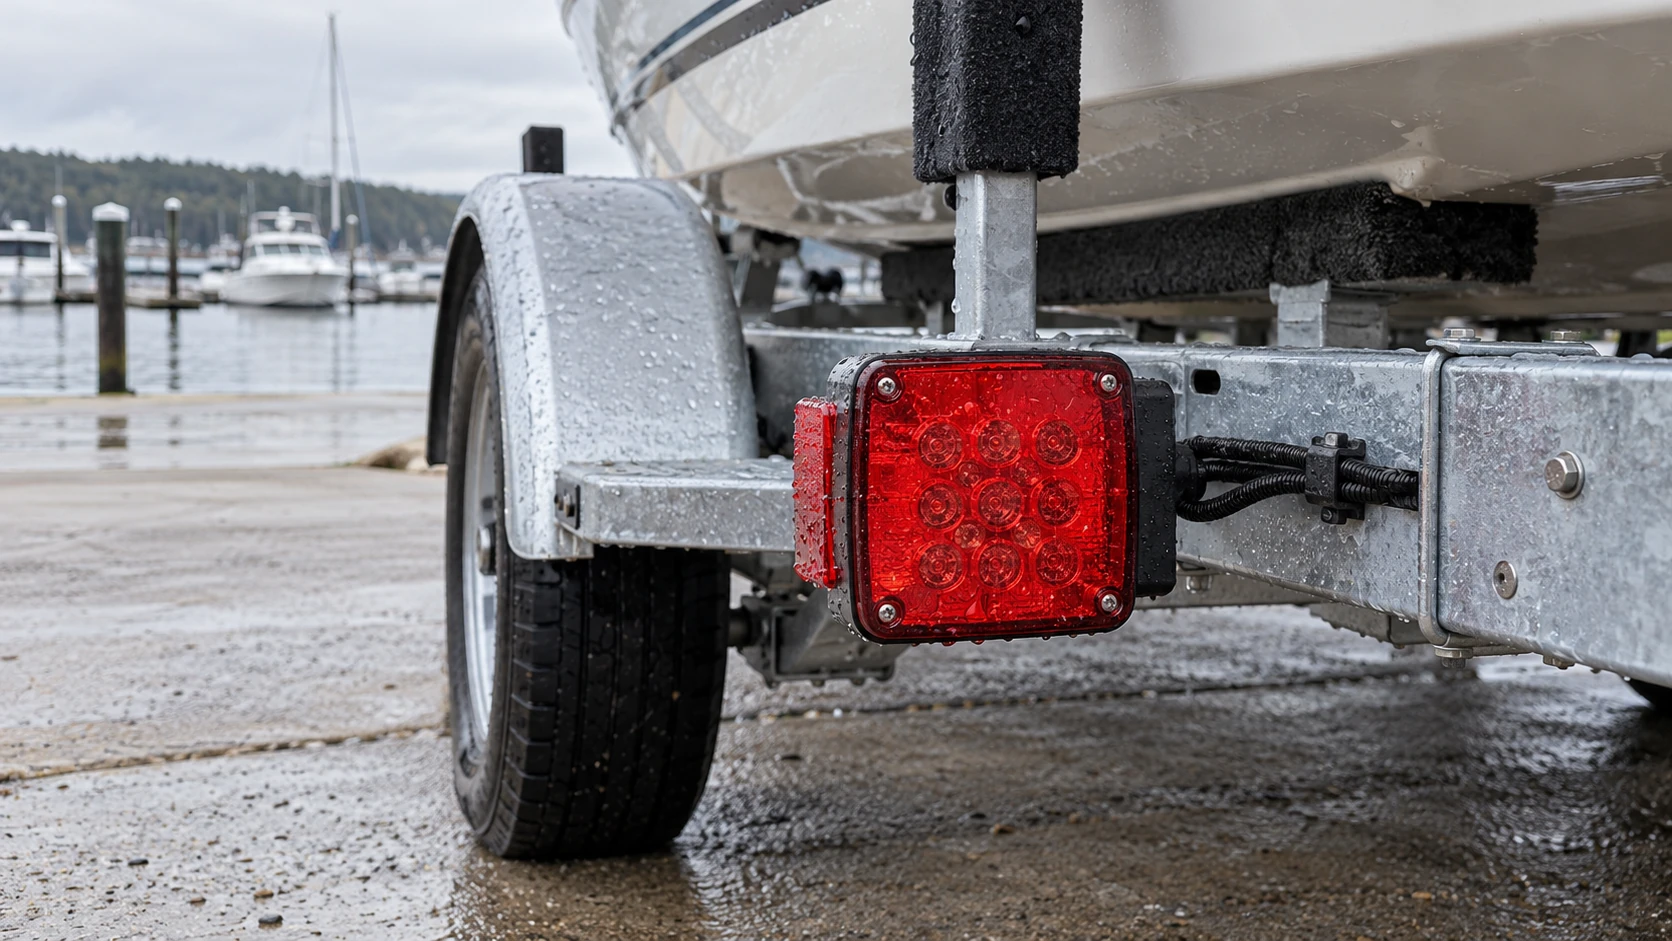
Are boat trailer lights waterproof?
Some boat trailer lights are designed for immersion. Others are intended only for weather exposure. The LED light source itself does not establish either capability. Check the exact assembly's stated use, installation instructions and ingress protection information.
A water protection rating also has a defined scope. HELLA treats splash exposure, temporary immersion and high-pressure cleaning as distinct tests. Passing one test does not establish every other type of water protection. A rating on a lamp enclosure does not extend automatically to an installer-added splice or the trailer's towing plug. HELLA's explanation of ingress protection tests describes these separate conditions.
Think of the lighting system as several water boundaries. A sound lens and housing protect the lamp's interior. A cable entry protects the point where conductors enter it. A connector needs its own contact and wire seals. A splice needs a complete seal around sound insulation. A ground attachment needs reliable electrical contact and protection from corrosion.
One successful boundary cannot compensate for another that has failed. A perfectly dry LED module can flicker because its ground terminal is deteriorating below the waterline. Equally, a clean connector cannot save a lamp with a cracked housing.
Start with the wet event and the timing
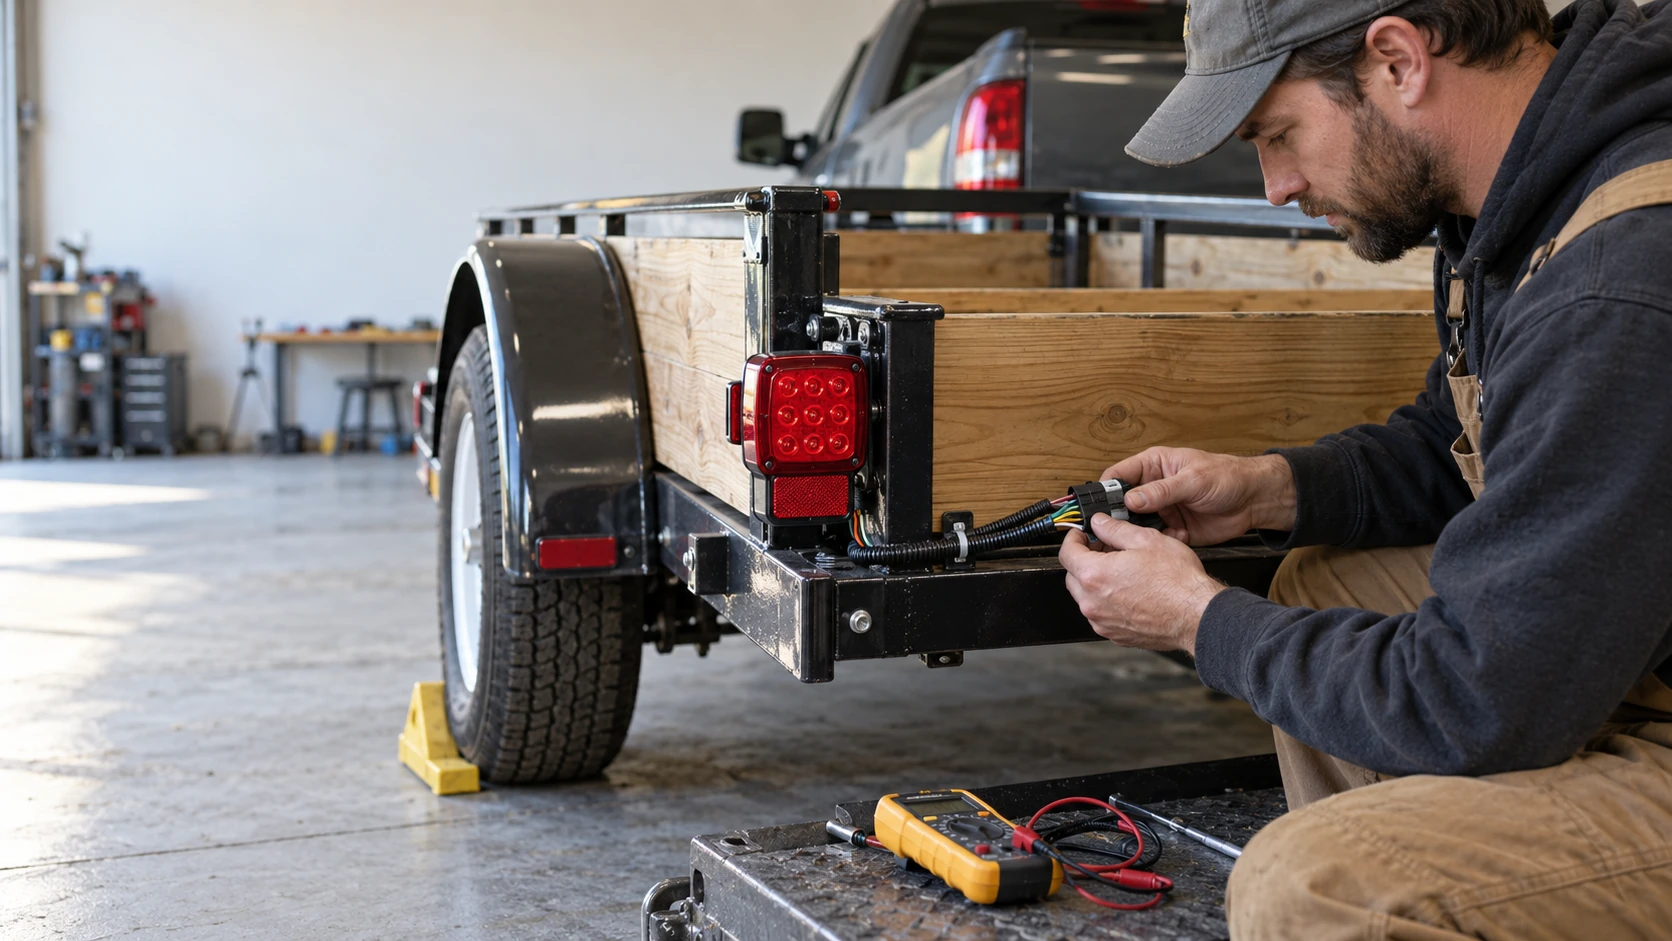
Move the trailer to a secure, dry working position, away from ramp traffic. Photograph visible droplets, staining and damaged connections before cleaning them. Disconnect electrical power before opening plugs, unwrapping repairs or removing terminals.
Record what happened immediately before the failure:
- After launching: identify which lamps, splices and attachments were actually submerged.
- After heavy rain: look for exposed plugs, upward-facing connector cavities and water running along a cable.
- After washing: inspect areas hit by a concentrated jet, particularly cable entries and damaged seals.
- After damp storage: look for retained moisture, corrosion and wiring resting against a wet frame or cover.
Then record the delay. Failure during immersion suggests a different starting point from failure the following morning. Immediate recovery after a connector is dried points toward that location, but unplugging and reconnecting can also temporarily improve a loose contact. Recovery is a clue, not proof that moisture was the only cause.
Avoid deliberately flooding a powered assembly to reproduce the symptom. Use photographs and observations from normal use, followed by inspection and controlled electrical checks on land. If a fuse has opened or a connector is visibly flooded or damaged, investigate with power isolated before trying the circuit again.
Match the symptom to the next inspection
Water-related faults can interrupt current, restrict it through corrosion, or create an unwanted conductive path. Those mechanisms can produce different symptoms, even on the same trailer.
| What changes after wet exposure? | Useful starting point | What would strengthen that diagnosis? |
|---|---|---|
| Both rear lamps become dim | Shared feed, towing connection or common ground return | A measurable loss in the shared circuit while the lamps operate |
| One lamp flickers or goes out | That branch's connector, splice, cable entry or lamp | The problem changes at a specific connection, or follows the complete lamp assembly |
| Tail lighting works, but braking or signalling causes dimming | A restricted shared connection or return path | The electrical loss increases when the additional function operates |
| An unintended function glows faintly | Contaminated contacts, leakage between circuits, or a return-path fault | Cleaning or repairing the identified connection removes the unwanted illumination |
| A fuse opens after immersion | A short or excessive current in wet wiring or a damaged lamp | Branch isolation identifies the affected section |
| The lights recover after drying, then fail again | A recurring entry point or corrosion left behind | Moisture or deposits reappear at the same location |
On a narrow screen, scroll the table horizontally.
These are starting points. A symptom alone does not distinguish a damaged LED driver from a poor connection. In particular, faint cross-illumination does not automatically mean that the wires were connected incorrectly during installation.
Inspect six places where water can change the circuit
1. The towing plug and local lamp connectors
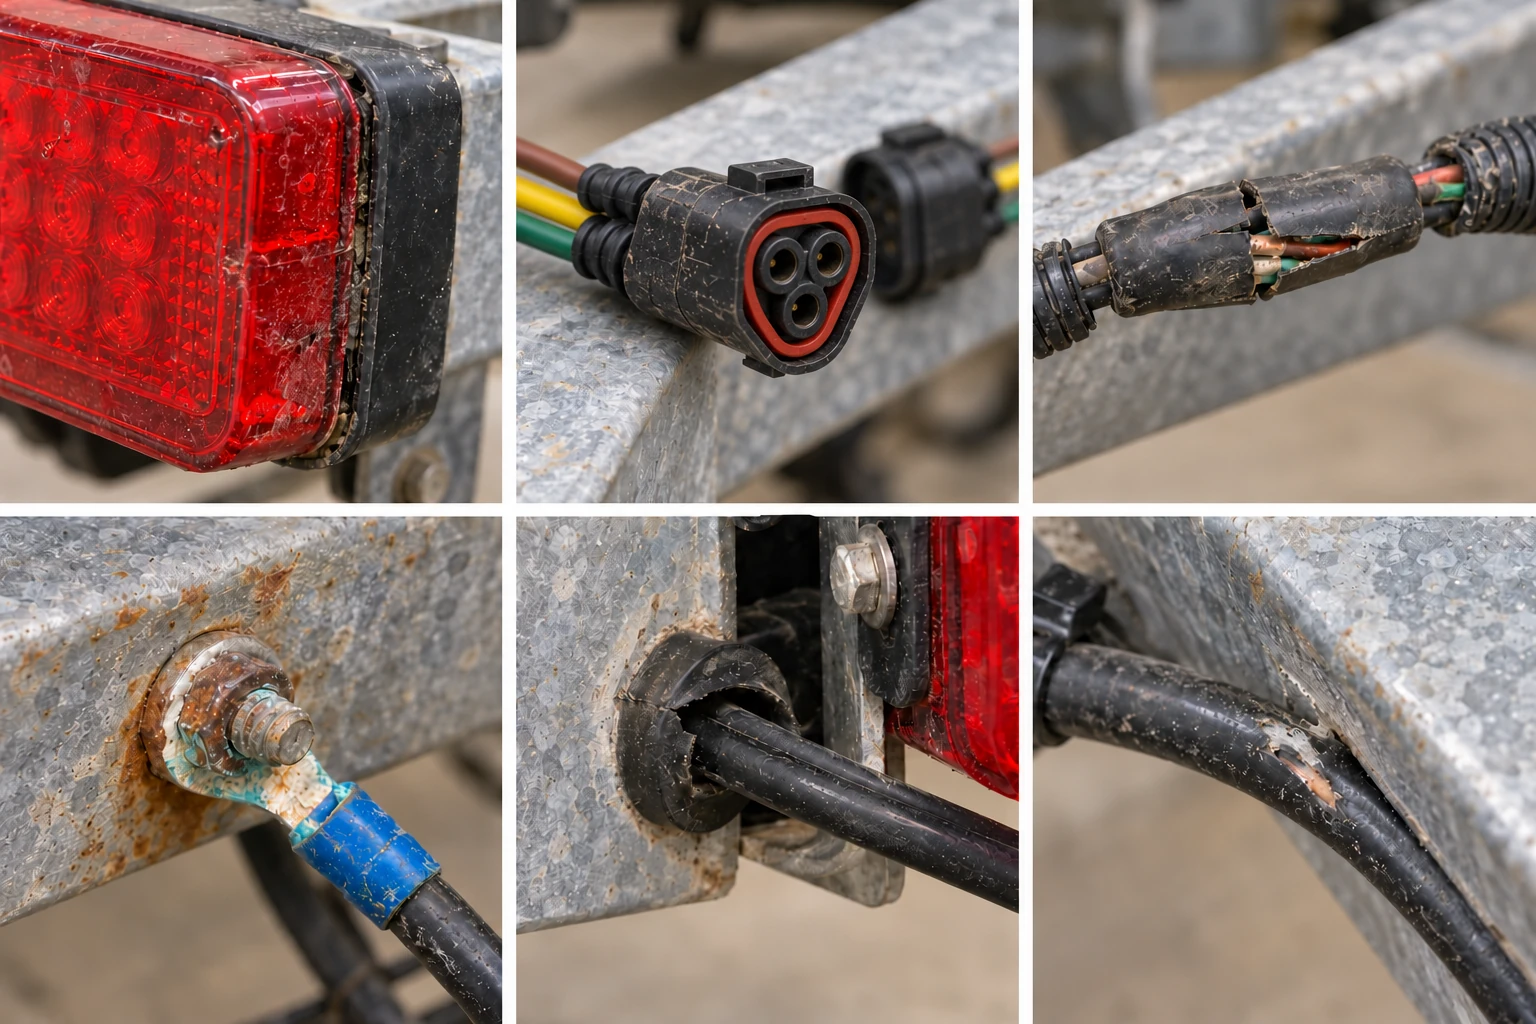
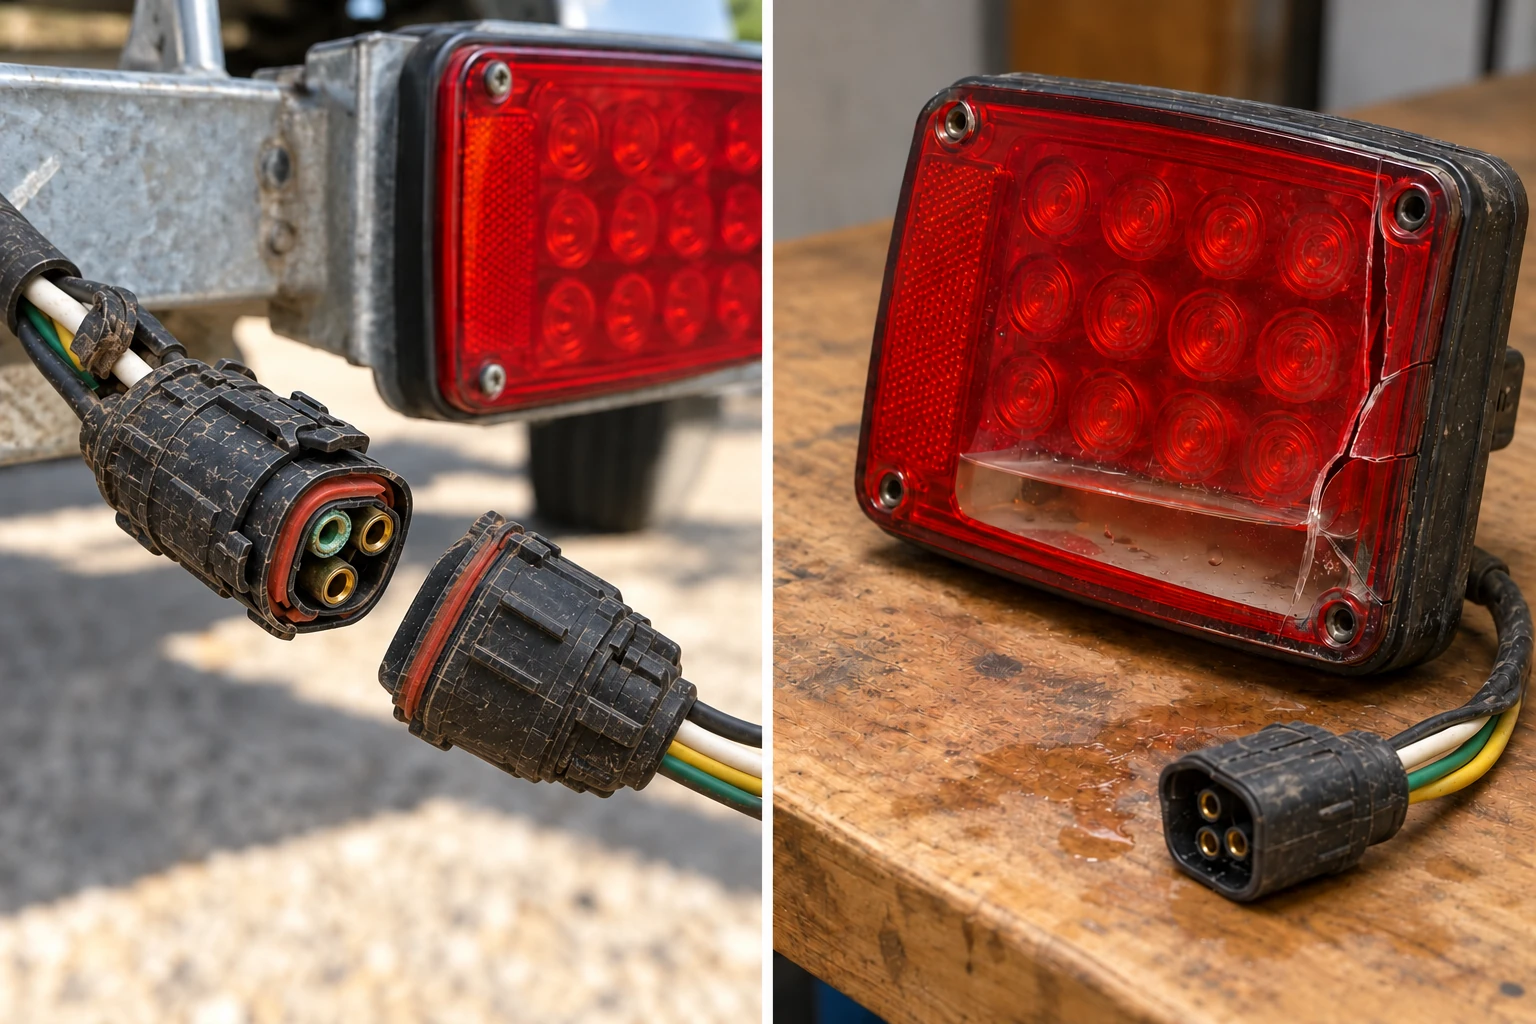
With power disconnected, separate the connector and inspect both halves. Look for trapped water, green or white deposits, darkened contacts, damaged seals, loose terminals and a latch that no longer holds the halves fully together.
Inspect the rear wire entries as carefully as the contact face. A clean-looking plug can still admit water around a pulled-back cable seal. Check that unused cavities have the specified sealing plugs and that the connector's wire seals suit the installed insulation diameter.
Do not assume a connector described as sealed has the same protection when disconnected. Its documentation should identify the conditions under which the seal works. During storage or launching, keep an unplugged connector supported and protected from immersion rather than leaving it on the ground or hanging where water collects.
If cleaning restores operation, assess the contacts themselves. Pitted metal, lost contact tension or a terminal that moves in its cavity calls for repair or replacement. Grease cannot restore the mechanical grip of a damaged terminal.
2. Harness splices and previous repairs
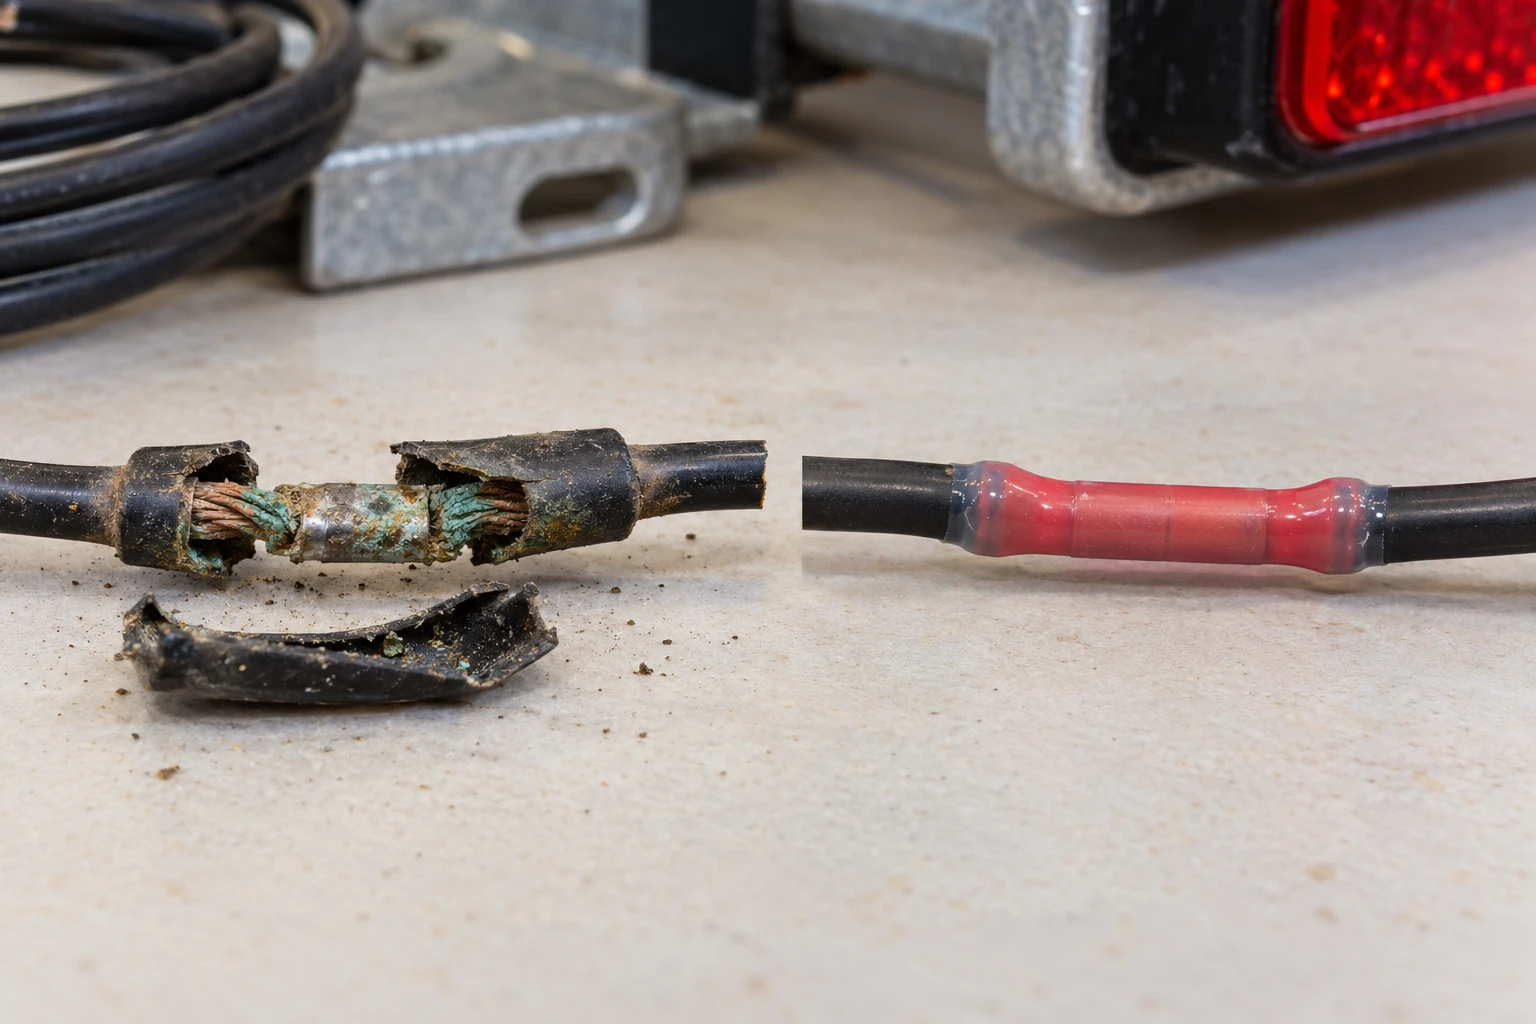
Follow the affected branch and examine every join. Electrical tape can hide an unsealed crimp, a twisted connection or corrosion extending beyond the visible repair. A sleeve that has shrunk around the middle may still be open at one end.
Look for an exposed conductor, a split sleeve, a join sized for the wrong wire, or several wires forced into a connector intended for one. Also check whether the joint is carrying tension because the cable has insufficient support.
When a splice is removed, examine the conductor beneath the insulation. Moisture can travel along wire strands from an entry point, so the visible joint may not mark the full extent of damage. Grote describes this wicking mechanism and warns that puncturing insulation during testing can introduce another entry point. Its guidance favours testing at existing termination points. Grote's vehicle lighting and wiring guide explains the problem.
If corrosion continues into the cable, replace the affected length back to sound material. Putting a fresh sleeve over a contaminated conductor leaves the underlying fault in place.
3. Ground terminals and the return circuit
Ground connections on a boat trailer experience the same immersion, road spray and vibration as the positive wiring. Inspect ring terminals, screws, studs and any frame connections used by the actual installation.
A fastener can feel tight while the electrical interface beneath it is corroded. Check for rust, loose hardware, damaged strands at the terminal and unsuitable coatings between surfaces that must conduct. Where the system uses a dedicated return wire, inspect that wire and its connections rather than assuming the frame is the return path.
Braking or signalling may expose a marginal return connection because the operating load changes. Depending on the lamp and harness design, an inadequate return can also contribute to unexpected interaction between functions. Confirm the condition electrically before replacing a lamp because it looks dim.
Restore the specified conductive attachment, secure it correctly, then protect the completed connection using materials suitable for the assembly. Do not place an insulating coating between surfaces that must make electrical contact. Nor should a permanent repair depend on an incidental return through the hitch ball.
4. Wire entries, grommets and strain relief
Inspect where each cable enters a lamp, connector, junction enclosure or trailer frame opening. Look for a displaced grommet, a split gland, hardened sealing material or a cable pulled sideways against its entry.
A cable held taut can repeatedly load the seal as the trailer moves. A long unsupported loop can catch on equipment or rub against the frame. Either condition may damage an otherwise suitable entry arrangement.
Check for abrasion just beyond the entry, where flexing is concentrated. Replacing a lamp without changing the cable routing may expose the replacement to the same stress. Correct the support and clearance as part of the repair.
Use the specified entry components. Smearing sealant over the outside of a loose gland does not restore its original cable grip or establish that the hidden sealing surfaces are sound.
5. Lamp housing, lens and internal moisture
Inspect the lens-to-housing joint, mounting areas and rear surface. Small impact cracks may be easier to see when the lamp is removed. Check whether mounting pressure or an uneven bracket has distorted the assembly.
Interpret internal moisture according to the lamp's construction. HELLA explains that temporary mist can occur in vehicle lamps designed with ventilation, while persistent moisture or visible water accumulation warrants investigation. That guidance does not establish that condensation is normal inside every sealed submersible LED lamp. HELLA's condensation guidance makes the distinction between temporary mist and conditions requiring inspection.
Standing water, recurring droplets accompanied by malfunction, or visible internal corrosion are stronger reasons to suspect failed protection. Check the manufacturer's service instructions before opening anything. A permanently sealed LED assembly may require complete replacement; a serviceable design may have a specified gasket or component repair.
Do not drill a drain hole in a sealed lamp or block a designed vent. Either change can alter the intended water protection. Drying the interior may restore light temporarily without restoring the failed seal or removing corrosion.
6. The cable between visible components
A harness can look intact at both ends and still have a damaged section between them. Examine places near clamps, frame edges, hinges, movable parts and previous tie-down points.
Look for flattened insulation, cuts, rubbing, stiff sections and unsupported cable. Open protective loom where inspection requires it; loom can conceal damage and retained debris. A protective sleeve is useful against abrasion, but it does not make a damaged conductor waterproof.
If several old repairs are clustered in an immersion area, replacing that harness section may provide a more durable result than adding another join. Preserve suitable cable size, circuit protection and routing when doing so.
Compare the circuit while the fault is present
A visual inspection identifies likely entry points. Electrical checks establish whether a connection is affecting the lamp.
For an intermittent fault, record the affected function and vehicle operating state when the symptom appears. Compare readings under the same conditions after repair. A measurement with all lamps switched off cannot establish that a corroded connection can carry their operating current.
At a dry, accessible service point, a technician can compare the supply delivered to the affected lamp and check the loss along its ground return while the relevant function operates. This separates a restricted feed from a restricted return. If no current flows because the circuit is open, resolve that condition before interpreting a voltage-drop test as evidence that the circuit is healthy.
Use manufacturer limits and appropriate test adapters. A high-impedance meter may show voltage on an unloaded circuit that cannot operate the lamp reliably. Conversely, modern vehicle trailer outputs may use electronic control, so an unsuitable test lamp or improvised load can give misleading results. Check both the feed and the return using the method specified for the system.
For wet-weather diagnosis, the result should lead to a location: loss across this connector, along this branch, or through this return attachment. Avoid replacing several parts at once before recording what changed. Otherwise, the immediate improvement may conceal which repair actually mattered.
When boat trailer lights keep burning out, confirm what failed
Owners often describe any repeated lighting failure as a lamp “burning out.” That can mean several things: a failed incandescent bulb, damaged LED electronics, a corroded terminal, an interrupted supply or a wet circuit that has opened its fuse.
An LED has no incandescent filament. Advice about cooling a hot traditional bulb before immersion therefore does not explain every LED failure. For LEDs, inspect enclosure integrity, cable entry, external connections and operating supply before deciding that repeated failure is simply normal bulb consumption.
After the external circuit has been made sound, a compatible known-good lamp can help isolate the remaining fault. Use the correct voltage, function connections and protected test arrangement. Do not connect a replacement into a visibly contaminated or shorted branch.
If the fault remains at the same trailer position with a known-good lamp, the local circuit needs further investigation. If it follows the original assembly onto a verified suitable supply and return, the assembly is implicated. Remember that an attached pigtail or connector travels with the lamp; a following fault does not prove the internal LED board alone has failed.
Consider an illustrative case: one rear lamp returns to normal after its connector is dried. Replacing only that lamp also seems successful because the connector was disturbed during installation. The next immersion wets the damaged wire seal again, and the symptom returns. The durable repair addresses the connector entry and any resulting corrosion, alongside replacement of the lamp if testing also finds internal damage.
How to waterproof trailer wiring after finding the entry point
Effective waterproofing starts with sound conductors, mechanically secure connections and a sealing system suited to the exposure. Adding an outer covering to a poor connection does not correct the connection underneath.
For a permanent splice, select a component intended for the environment and the conductor size. Adhesive-lined heat-shrink terminals are one established option: Ancor describes terminals whose lining forms a seal as the sleeve shrinks, with additional strain relief. That is a specific construction, not a property of every coloured crimp sleeve. Ancor's marine terminal specifications explain the design.
Follow the connector manufacturer's preparation, crimping and heating instructions. Use the specified tool and die. Verify that the conductor is properly captured before sealing, and that the finished sleeve seals onto intact insulation at both ends. Do not overheat the insulation or enclose moisture and corrosion within the repair.
Where a repair joins different wire sizes or multiple conductors, use a connector designed for that arrangement. A seal sized for one cable cannot be assumed to close around a different combination. Support the finished joint so vibration and cable weight do not load the crimp or pull on its seals.
Route wiring away from sharp edges and moving parts. Where practical, move serviceable joins out of routinely submerged positions while maintaining suitable clearance and access. Keep enough movement allowance for the installation without leaving loose cable to snag.
Choosing waterproof trailer wire connectors
Check what the connector specification actually covers: the required exposure, assembled condition, wire size range, sealing accessories and installation method. A reassuring product description is less useful than a defined application.
For a detachable connection, assess the complete pair. The terminal retention, mating seal, rear wire seals, cavity plugs and latch all contribute to the finished assembly. Mixing incompatible halves or omitting a small sealing component can defeat the intended protection.
For an existing connector, determine whether servicing can restore it. Removable contamination on undamaged contacts differs from severe pitting, loose terminal fit or a cracked shell. Replace components that cannot maintain electrical contact and their intended seal.
Apply connector-compatible grease only as directed. It can help protect a suitable connection, but it is not a replacement for a missing seal, damaged contact or cracked housing. Filling a wet connector with grease also leaves the original contamination unresolved.
How to waterproof boat trailer lights without trapping the problem
For an existing lamp, the first task is to restore the manufacturer's intended protection. Check the correct gasket, wire entry, mounting arrangement and any designed ventilation or drainage features.
A serviceable housing may permit replacement of a damaged gasket. A permanently sealed unit with internal corrosion presents a different repair decision. An external bead of sealant should not be treated as proof that an internally damaged assembly is reliable again.
Check the mounting surface and cable support before installing a replacement. An uneven bracket, excessive mounting force or a cable pulling on the entry can recreate the damage. Keep seals and mating surfaces clean during assembly, and use only materials compatible with the lamp and its instructions.
Do not coat the optical surface, conceal required markings or block intended openings. A repair should preserve the lamp's light distribution and designed construction as well as its electrical operation.
Decide whether to maintain, repair or replace
Use the physical evidence and electrical result together. Water found near a lamp is not proof that the interior has failed, and a lamp that lights again after drying has not necessarily regained its original protection.
| Finding | Appropriate direction |
|---|---|
| Contamination on serviceable, undamaged contacts; normal operation returns after correct cleaning and drying | Service the connection, restore its protection and verify operation |
| Pitted contacts, weak terminal grip, a damaged connector seal or cracked shell | Repair or replace the affected connector components |
| Corroded strands beneath insulation or repeated failures along an old repair | Replace the affected cable length and make new sealed terminations |
| Excessive loss at a ground attachment under load | Restore or replace the terminal and attachment, then retest |
| Cracked sealed housing, persistent internal water or internal corrosion with malfunction | Assess the lamp for replacement according to its service design |
| Fault follows the lamp assembly despite verified suitable supply and return | Replace or service the implicated assembly, including its attached lead and connector as appropriate |
| Fuse opens repeatedly after water exposure | Locate the short or excessive-current fault before restoring service |
On a narrow screen, scroll the table horizontally.
Never increase a fuse rating to keep a wet circuit operating. Where several branches share protection, controlled branch isolation can help identify the faulty section. Both a harness fault and a damaged lamp can exist at the same time, so finding one does not automatically clear the other.
How to replace submersible trailer lights after water damage
Before removal, record the existing lamp's position, functions, mounting and connection details. Isolate power, then remove the assembly without pulling on the harness. Inspect its mounting area and the cable immediately behind it.
Choose a replacement specified for the trailer's electrical system, required functions, mounting position and intended immersion exposure. Match the actual documentation rather than assuming that a similar shape or plug guarantees compatibility. Requirements and connector conventions differ between markets, including North America, the UK, Australia and New Zealand.
For a GOODIN 4-inch LED trailer light, the same checks apply: confirm the exact model's functions, voltage and stated environmental suitability, then inspect the surrounding harness before installation. The GOODIN LED trailer light range is one component choice within that complete repair. The condition of the splice, ground and cable entry still determines whether the installed system can withstand its operating environment.
Fit the replacement using its specified hardware and sealing components. Support the cable independently, restore any required return connection, and complete the electrical checks before towing. Record the entry point or damaged part corrected during the job; “new light installed” alone does not explain why the previous assembly failed.
Should you unplug boat trailer lights before launching?
For many conventional lighting arrangements, disconnecting before immersion is part of the launch routine. BoatUS recommends disconnecting in the staging area a few minutes before launching, allowing traditional lamp assemblies to cool. Its advice is particularly relevant to incandescent bulb life; disconnecting does not repair a leaking LED enclosure or make an unsealed splice watertight. BoatUS's trailer wiring care guidance discusses this practice.
Check the trailer and tow vehicle instructions before applying that advice to every system. Some surge-brake reverse-lockout solenoids receive their electrical supply through the trailer connection. Dexter's actuator manual explicitly describes the solenoid's connection to the vehicle's reverse-light circuit. Disconnecting the plug can therefore affect the reverse-lockout function. Dexter's light-duty surge actuator manual documents this arrangement.
Use the launch procedure appropriate to the installed equipment. Keep a disconnected plug out of the water, and reconnect and check the required lighting before departing onto the road. Do not leave it disconnected because the lights were working earlier in the day.
A maintenance routine that catches recurring water entry
Before each trip, check lighting operation and inspect accessible connections for loose retention, damaged seals and cable strain. A quick visual check is especially useful after a previous wet-related repair, when the corrected location is known.
After saltwater use, follow the trailer and component manufacturers' washing instructions. Use gentle freshwater rinsing where specified, with electrical power isolated and connections appropriately closed or protected. Avoid directing a pressure jet at seals or exposed electrical openings unless the component is specifically approved for that treatment.
Before storage, allow the equipment to dry and support plugs clear of standing water. Check that covers and cable arrangements do not hold water against connections. Revisit corrosion-prone attachments and old repairs during normal maintenance, rather than waiting for the next complete lighting failure.
After a repair, verify tail, stop and turn functions, including combinations that previously triggered the symptom. Check any other fitted lighting required for the trailer. Compare the result with the recorded failure conditions, then inspect the repaired location after the next normal launch or rain exposure. Do not create an artificial immersion test unless the manufacturer's procedure calls for one.
Questions about wet boat trailer LED lights
Are LED trailer lights submersible?
Only when the particular assembly is specified for that use. LED describes the light source. Immersion suitability depends on the housing, seals, cable entry and stated operating conditions. The rest of the installation needs suitable protection as well.
Why do the lights work again the next morning?
Drying can remove a temporary conductive path or change an unstable connection. It does not remove corrosion, restore contact tension or close a split seal. Inspect the location associated with the recovery and verify the circuit under load before calling the repair complete.
Can corrosion cause dim light without blowing a fuse?
Yes. A resistive connection can restrict current and reduce the voltage available to the lamp without creating an overcurrent condition. A fuse that remains intact therefore does not establish that the connector, feed or ground return is healthy.
Should I replace the bulb or the whole lamp?
Check the construction. A serviceable incandescent assembly may allow bulb and gasket replacement. Many sealed LED assemblies are replaced as a unit. In either case, correct the water entry and external electrical damage; otherwise, the replacement can face the same conditions.
What evidence shows that the repair has worked?
Look for stable operation of the affected functions, a sound supply and return under load, and an identified entry point or damaged connection that has been corrected. Follow up after normal wet use. If the same location holds moisture or the symptom returns, reopen the diagnosis there before replacing another lamp.
New LED Trailer Lights Not Working Correctly? How to Separate Wiring, Ground and Lamp Faults
Related Article